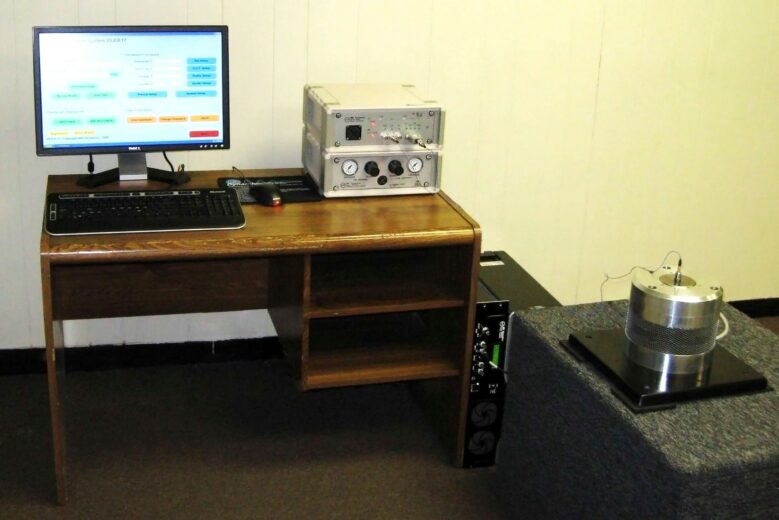
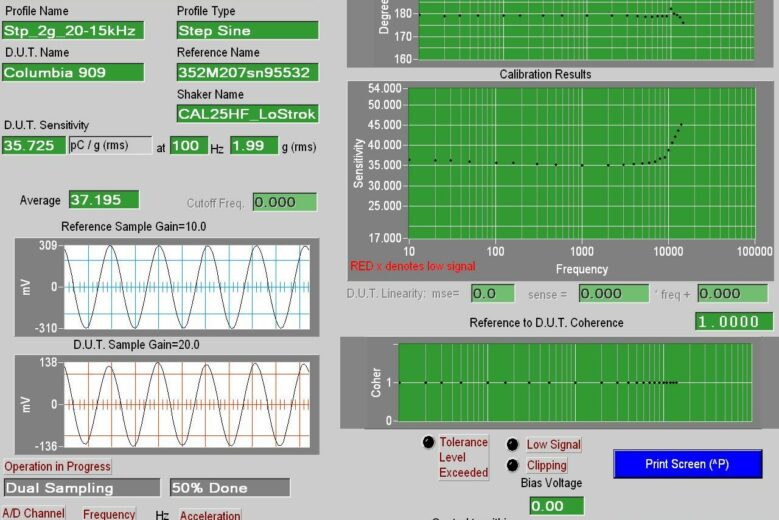
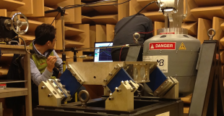
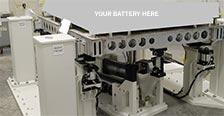
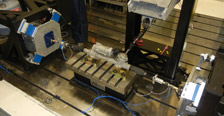
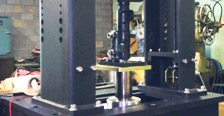
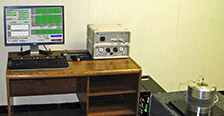
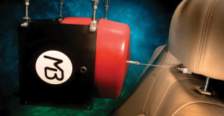
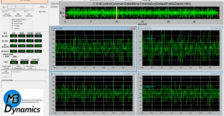
MB’s Win475 automated accelerometer calibration systems offer turnkey, multi-function, low uncertainty, automated calibrations of accelerometers and velocity transducers. Calibration specialists deploy the Win475 for repeatable low-uncertainty calibrations, reduced calibration costs and calibration times, and maximization of metrology lab productivity. MB Win475 automated accelerometer calibration systems can calibrate virtually all accelerometer technology types, regardless of size and weight, including charge, low-impedance, voltage, servos, strain gauge, piezoresistive, capacitive, MEMS, TEDS, and AC- and DC-coupled. It can further calibrate both displacement and velocity transducers, even those with a built-in meter and no AC output. Win475 system Transfer Uncertainty values match or surpass more expensive alternatives.
The MB Win475 automated accelerometer calibration system calibrates over a frequency range of 1 Hz to 10 kHz. It also uses FFT processing and filtering at each calibration frequency for low uncertainty measurements; makes transducer DC measurements, including ZMO, Z-in and Z-out plus shunt calibration; and minimizes operator error, via automatic, software-controlled signal conditioner gain setting channels for maximum signal-to-noise during calibrations. The Win475 and its CAL50 vibration calibration exciter perform calibrations to 35 g’s pk and displacements to 25 mm pk-to-pk, depending on the frequency and weight of the device under test (DUT). DUTs weighing <900 grams can be calibrated via the Win475 within performance specifications.
The designation “Win475-Standard” refers to the Reference Standard Accelerometer (REF), a single-ended standard embedded within the CAL50 Vibration Exciter. The REF is calibrated according to ISO 16063-11 (primary calibration) using a laser vibrometer. REF laser calibration results in lower DUT uncertainties when the Win475-Standard is used for back-to-back DUT calibrations. MB Dynamics also offers the “Win475-Basic”, where the REF is calibrated using secondary or back-to-back methods. The Win475 is a proven calibration solution, with an installed customer base exceeding 200 systems. The Win475-Standard is also cost-justifiable, with as few as 50 transducers requiring calibration.
The Win475 automated accelerometer calibration system family includes options for calibrations to frequencies as low as 0.1 Hz; air bearing shakers, allowing for sensitivity and phase calibrations out to 20 kHz; system configurations, in compliance with ISO 16063-21; resonant search of a transducer to 50 kHz; transducer transverse sensitivity measurements; simultaneous calibrations of up to eight (8) DUTs; shock calibrations of up to 13,000 g’s; calibrations over temperature extremes from -185°C to +800°C; and accelerometer amplitude linearity measurements up to 600 g’s pk.
ISO 16063-21 Compliance
The ISO 16063-21 standard, “Vibration calibration by comparison to a reference transducer” describes the calibration of rectilinear vibration transducers by comparison to a standard that is calibrated by primary methods. The frequency range is 0.4 Hz to 10 kHz, or as specified by a metrology lab. Per this ISO standard, typical values for electrodynamic exciters designed for frequency ranges of 10 Hz to 10 kHz are 200 to 1000 m/s² RMS acceleration and 10 mm pk-to-pk displacement. The vibration exciter has demanding requirements, including transverse, bending and rocking acceleration that shall be ≤10% at frequencies ≤1 kHz and ≤30% at frequencies >1 kHz. Total harmonic distortion over the whole frequency range shall be ≤10%. MB’s Win475-Standard, when used along with any MB air bearing exciters – Models CAL25HF, CAL25AB and CAL12AB – complies with ISO 16063-21. MB can supply an uncertainty budget for the Win475-Standard. The budget takes into consideration the uncertainties associated with REF laser calibration; REF drift over time, CAL25HF transverse acceleration; voltage ratio measurements, gain matching in the REF and DUT conditioning amplifiers, etc. Users looking to develop their own uncertainty budgets would start with the MB-supplied Win475-Standard uncertainty budget. Then, in accordance with the methods set forth in ISO 16063-21, users would combine significant in-laboratory uncertainty sources, including the DUT, to determine the attainable expanded uncertainties of their calibrations.
Win475-Low Frequency Calibration and Performance Verification
Low-frequency accelerometers, vibration meters, and velocity transducers are used for seismic measurements, bridge & building monitoring, shipboard measurements, suspension & ride quality, tilt/orientation and motion detection, safety systems, modal studies, train, and off-highway equipment measurements, measuring rigid body motion, whole-body vibration monitoring, and making measurements where the data are integrated to yield velocity or displacement. Amplitudes in milli-g’s and frequency ranges near DC are common. The Win475 Low Frequency Option, Win475-LF, calibrates from 0.1 to 200 Hz at g-levels from 0.006 to 1.4 g’s pk or 1 g rms, and at displacements as long as 280 mm pk-pk as shown below. It uses a REF that is calibrated via primary methods gravimetrically in the range 0.07-0.5 Hz, using a laser vibrometer from 0.5-10 Hz. This helps to achieve extremely small uncertainties. MB achieves this impressive performance using both its CAL2-300H actuator and innovative software control. The CAL2-300H uses a linear motor with frictionless air bearings under position control with a very-high-resolution encoder, in combination with acceleration control using a 1200 mV/g reference accelerometer. The horizontal air bearing stage can calibrate transducers and meters weighing up to 5 kg. MB Win475LF Low-Frequency Calibration and Performance Verification System Datasheet (Rev 5/20)
Win475 HL-BLUE and HL-RED Series Extreme Range Temperature Sensitivity Calibrations and Vibration Transducer Performance Verifications
Vibration monitoring transducers operate continuously at temperatures above +400°C, for intermittent duty at over +700°C, and over large +600°C thermal cycling excursions. Such applications include gas turbine, jet engine and automotive engine development and monitoring. Prolonged exposures to the bitter cold of the Arctic tundra and high altitudes are harsh environmental conditions at the other end of the temperature scale. Within such extreme temperature environments, end-user testing, calibration, and measurement needs include validation of the stability and reliability of the transducer & cabling; thermal performance characterizations; and temperature sensitivity curve development over the full “extreme range” of end-use temperatures. The MB Win475 Extreme Range calibration option provides this functionality. This Option exposes accelerometers being calibrated (DUTs) to controlled temperatures over a range of +800°C to -185°C. It measures DUT temperature sensitivity with good repeatability, while exciting at 160 Hz, and is capable of vibrating at frequencies from 10-1,000 Hz, depending upon DUT mass.Datasheet Download: MB Win475 HL-BLUE and HL-RED Extreme Range Temperature Sensitivity Calibrations and Vibration Transducer Performance Verifications (Rev 01/19)
Win475 Transverse Sensitivity Option
Vibration sensors are designed to measure motion in one principal axis perpendicular to the mounting base. But an accelerometer or velocity pick-ups signal output is contaminated by motion in other directions. The transverse effect varies depending on the direction and amplitude of off-axis vibration. Transverse sensitivity refers to such output caused by cross-axis motion, expressed as a percentage of the nominal sensitivity with directional dependence. ISO 16063-31:2009 “Methods for the calibration of vibration and shock transducers — Part 31: Testing of transverse vibration sensitivity” was written to specify details of the instrumentation and methods to measure vibration transducer transverse sensitivity. The MB Win475-TS Option facilitates reliable, accurate measurements of vibration sensor transverse sensitivity, in accordance with ISO 16063-31 “Section 4, Determination of transverse sensitivity using a single-axis vibration generator.” The Win475-TS determines transducer vibration sensitivity perpendicular to its sensing axis. The magnitude of this transverse sensitivity varies with the direction of the off-axis vibration. The Win475-TS determines, reports and plots the maximum value; maximum angle; and computes the ratio of the transverse sensitivity to the nominal sensitivity at user-selected frequencies. Other transverse sensitivity measurement systems work ONLY at one frequency. The Win475-TS is applicable over a frequency range of 30-2000 Hz at 100 m/s² (frequency dependent). The Win475-TS option works without requirements for mounting or re-mounting a transducer during the measurement, thus avoiding the uncertainties encountered in methods requiring repeated mounting. This makes it easier for the end-user and both expedites and automates the transverse sensitivity measurement process. MB Win475-TS Datasheet (Revision 11/18)
Win475 Multi-DUT Calibration Option
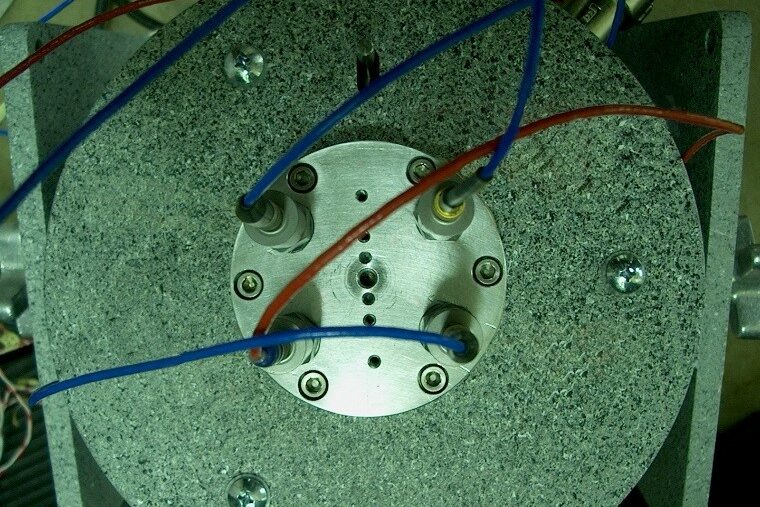
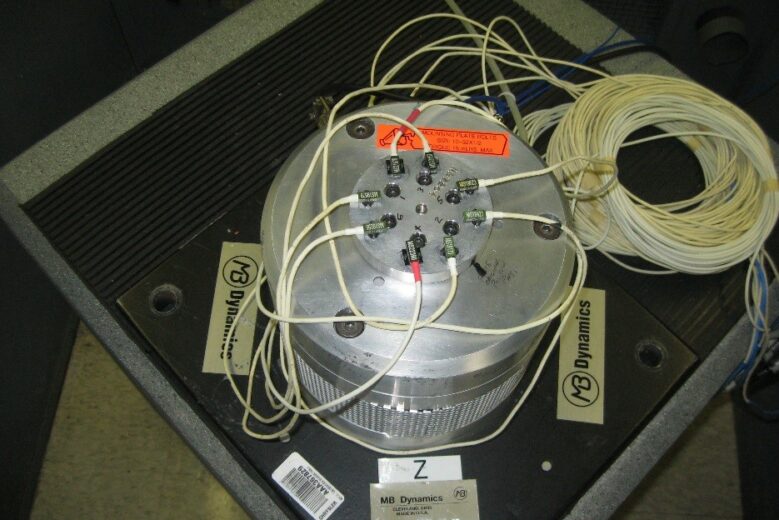
The Win475-Basic and Win475-Standard provide low uncertainty, broad frequency range calibrations on one transducer, or DUT, at a time. However, some end-users use transducers over a narrower bandwidth, or do not require very low uncertainty calibrations each time that a DUT is calibrated, or require frequent verification of accelerometer performance where rapid calibration turnaround time can be traded off against bandwidth and uncertainty. For those applications, MB provides its MB Win475-Multi-DUT Calibration Option in two versions. For end-users with charge, IEPE, voltage mode, and capacitive accelerometers, the four DUT Option enables simultaneous calibrations of four identical model transducers. The nominal frequency range is 5–4000 Hz at up to 10 g’s pk. Over the 10–2000 Hz frequency range, uncertainty is <3%. This option uses a CAL50, the exciter in the Win475-Basic and Win475-Standard, with one REF at the center for conventional one-DUT calibrations, plus four satellite REFs for each of the four DUTs. The REFs mount under the Test Instrument Mounting Fixture (TIMF) which bolts to the CAL50 armature. For end-users with piezoresistive bridge-type accelerometers, the eight DUT Option enables simultaneous calibrations of up to eight piezoresistive transducers of the same model. This Option is used in multiple calibration labs supporting automotive crash testing. Here, numerous piezoresistive transducers are incorporated onto ATDs, whose sensitivities and valid outputs are measured before and after a test. The eight-DUT Option performs sensitivity calibrations over the frequency range of 10–4000 Hz, at up to 10 g’s RMS, plus performs static measurements on all DUTs, including ZMO, Zin / Zout and shunt. Six different shunt resistors can be selected, plus there is an external socket for a customer-selected resistor. This Option also reads an electronic ID on the sensor. This Option uses one of MB’s three air bearing shakers, either the CAL25HF (from the ISO 16063-21 Option), a CAL25AB or a CAL12AB – see the Calibration Exciter page for details. This Option uses one REF at the center for conventional one-DUT calibrations and the same REF for each of the eight DUTs. The REF mounts under the TIMF, which bolts to the air bearing exciter armature.
Win475 600g Accelerometer Amplitude Linearity & Sine Calibration Option
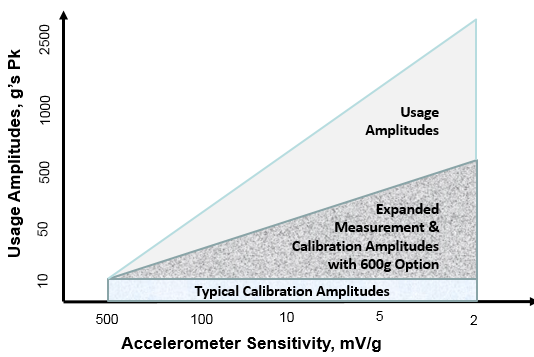
The Win475 calibration system performs comparison calibrations of accelerometers and velocity transducers using sine and random vibration. The Win475-Basic and Win475-Standard perform sine calibrations up to 20 g’s pk, depending on the exciter, frequency range, and DUT weight. For accelerometers used in shock and ballistic applications, end-users often desire to perform calibration and performance verifications at amplitudes above 20 g’s. The MB 600 g Accelerometer Amplitude Linearity Option for the Win475 Calibration System calibrates and validates accelerometer amplitude linearity, or non-linearity, at amplitudes from 50-600 g’s pk at frequencies below 1000 Hz, using sine vibration. With this Option added to MB’s Win475 Calibration System, sensitivity deviations can be measured over a user-selected range of high amplitudes and up to four sine frequencies, yielding actual high-amplitude sensitivity results augmenting those from low-g sine calibrations. The graphic below shows calibration sensitivities which can be provided with the 600 g Option over a wider range of usage amplitudes than normal 10 g calibrations. A metrologist’s uncertainty budget may include a term to account for calibration uncertainties at 10 g’s, when a user is testing at significantly higher g’s. This 600 g Option enables the metrologist to reduce uncertainty by facilitating actual sensitivity measurements at higher amplitudes and multiple frequencies. The 600 g Option uses structural resonance of specially designed metal beams that have very low damping to create these high-vibration levels at the end of a beam. The beam is vibrated by an electrodynamic shaker that is further controlled by the Win475 software. The vibration at the end of the beam is measured by a REF, which is mounted underneath the beam with the DUT mounted directly above the REF. Four beams are supplied with the 600 g Option. Each beam has one frequency, namely, its nominal frequency, which coincides with its first flexible mode, and where the vibration created by the shaker is highly amplified.
Win475-Shock Secondary Calibration of Shock Transducers Using ShockDrop Exciter Option
The Win475 calibration system performs comparison calibrations of accelerometers and velocity transducers using sine and random vibration. The Win475-Basic and Win475-Standard perform sine calibrations up to 20 g’s pk, depending on the exciter, frequency range, and weight of the accelerometer being calibrated, or DUT. The Win475-600g Sine Calibration and Amplitude Linearity Option uses sine vibration to perform calibrations from 50-600 g’s pk at up to four frequencies below 1000 Hz. For accelerometers used in shock and ballistic applications, end-users wish to perform calibration and performance verification checks at higher amplitudes than 20 g’s or even 600 g’s, to increase their confidence in measured test results at amplitudes much higher than those nominally used for DUT calibration. The Win475-Shock Calibration Option performs repeatable shock accelerometer calibrations measuring as large as 40 mm³ and weighing up to 200 grams from 100-13,000 g’s pk using transient events, versus sine or random vibration. This Option measures the sensitivity and amplitude linearity of the DUT with repeatability <±5% and is in accordance with Section 5.2.3 of ISO 16063-22 “Shock calibration by comparison to a reference standard transducer”. DUTs may be charge, differential charge, IEPE, voltage mode, piezoresistive, capacitive, and MEMS accelerometers. Target amplitudes in g’s pk are: 100, 200, 500, 1000, 2000, 5000, 10000, and 13000. Representative durations are 100 g’s (2 msec), 2,000 g’s (0.36 msec), 10,000 g’s (0.08 msec), and 13,000 g’s (0.08 msec). The Win475-Shock Option uses a ShockDrop exciter with a REF installed on the bottom of a special mounting plate and a DUT on top of the mounting plate. The mounting plate rides in a rail cart which free-falls into contact with a padded stop on an anvil. The anvil is located at the base of the ShockDrop apparatus. Various combinations of anvil pads and drop heights are used to achieve the desired peak g-events for a selected calibration. The ShockDrop exciter includes a series of anvil pads, or mitigators, to control pulse amplitude. Pulse rep rate or duty cycle is 1 pulse every 10-15 sec. The single-ended REF design greatly reduces mass loading effects common with double-ended REFs used in other shock calibration apparatus. In competitive systems, the DUT mounts piggyback to the REF which aggravates the mass loading effect. In MB’s ShockDrop exciter, the REF is an IEPE accelerometer with 0.25 mV/g sensitivity, ±20,000 g’s F.S., >90 kHz natural frequency, weighing 6 grams, and calibrated at 100, 500, 1000, 5000 and 10000 g’s, with reported sensitivities at each amplitude. Win475 Drop-Shock Datasheet (Rev. 11/18)
Win475 MULTI-DUT CRASH-CAL (MDCC) for Automated Multi-DUT Calibrations of Piezoresistive Accelerometers
The Win475 MULTI-DUT CRASH-CAL (MDCC) from MB Dynamics is a highly versatile automated accelerometer calibration system. It simultaneously, efficiently and accurately calibrates anywhere from one (1) to eight (8) piezoresistive (PR) accelerometers (DUT’s) of the same model, such as those used in automotive safety laboratories and crash testing, over frequencies from 10 Hz to 4000 Hz. The MDCC further supports automated single-DUT calibrations of piezoelectric, IEPE, voltage, velocity, and other accelerometer and vibration sensor types, over frequencies from 5 Hz to 15 kHz, all utilizing the MB Dynamics CAL25AB air bearing calibration vibration exciter.
Offered as a complete turnkey system, the MB Dynamics Win475 MDCC automated accelerometer calibration system includes the: MB Dynamics CAL25AB air bearing calibration vibration exciter; Model 407-8X multi-channel signal conditioner; an internal removable reference (REF) accelerometer with 100 mV/g sensitivity and usable frequency range to 15 kHz, traceable to national standards and ISO 17025; eight (8) DUT TIMF adaptor plates; one single-DUT TIMF; an MB Dynamics 500VI power amplifier; Win475 MDCC software and NI DAQ card; a 475PCM module; a Windows 10 PC, monitor, keyboard and printer; user manuals; a calibration accessory kit; installation, and start-up and training support.
The Win475 MULTI-DUT CRASH-CAL automated accelerometer calibration system is already in use by multiple in-house automotive crash test laboratories, in support of their calibration requirements to industry standards. Here, numerous PR transducers are incorporated onto ATDs, whose sensitivities and valid outputs are measured both before and after a test.
The MB Win475 MULTI-DUT CRASH CAL system allows for simultaneous automated calibrations of up to eight (8) PR bridge-type accelerometers in a single test, over a multiple-DUT frequencies of 10 Hz to 4000 Hz. It also allows for single-DUT automated calibrations of piezoelectric, IEPE, voltage, and velocity sensors over frequencies from 5 Hz to 15 kHz. The system also features a 18 grms bare table acceleration, capable of 10 grms with 8 PR accelerometers mounted on the exciter (<10 grams each). End-users can choose from among any one of seven (7) individual (six internal, one external) high-precision resistors for shunt calibration. Overall single-DUT and multi-DUT Expanded System Uncertainty (ESU) is ±1.2% at 100 Hz (minimum 3 mV signal), in accordance with the ISO 16063-21 standard.
The MB Dynamics Win475 MULTI-DUT CRASH CAL automated accelerometer calibration system supports any single axis translational accelerometer complying with the SAE J211 or SAE 2570 standard. Its print utility feature further allows for the display of SAE J211 and SAE 2570 tolerance bands on the accelerometer calibration certificate. End-users may also opt for system integration into a customer-specified database. The MB Dynamics MULTI-DUT CRASH-CAL can also read onboard sensor electronic identification, such as “1-Wire” electronic serial number ships, or within TEDS piezoelectric accelerometers (per IEEE 1451). Other capabilites and global test standards may also apply. Please consult MB Dynamics for details.
The unique and versatile MB Dynamics Win475 MULTI-DUT CRASH CAL automated accelerometer calibration system helps end-users to realize a number of tangible benefits, including:
● Automated multi-DUT accelerometer calibrations, offering up to 70% time savings, as compared to single-DUT calibrations
● Cost savings, by eliminating the need for traditional outsourced accelerometer calibration services
● Small uncertainty + affordable price = outstanding value
● Unique self-check feature quickly verifies system operation
● Facilitates in-house accelerometer calibrations on-demand with expedited turnaround times
● Ensures proper accelerometer calibration processes and aids in simplified, accurate in-house record-keeping
for ISO audit compliance
● Increased accelerometer calibration frequency ensures good test data and reduced measurement uncertainty
● Automation eliminates the risks of human errors inherent to manual accelerometer calibration systems
● Expedites accelerometer calibrations to free up end-users for other measurement tasks
● Available with full technical support from MB Dynamics
Win475 MULTI-DUT CRASH CAL (Rev 05/19)
"4-in-1" MULTI-DUT ACCEL-CAL Automated Accelerometer Calibration System (MDAC)
The highly versatile “4-in-1” multi device under test (multi-DUT) automated accelerometer calibration system (MDAC) can simultaneously, efficiently, and accurately perform calibrations of up to four piezoelectric(charge or PE), IEPE (low-impedance voltage mode), or variable capacitive (VC) accelerometers (DUT’s) of the same model and type, each weighing up to 20 grams, over frequencies from 1 Hz to 4000 Hz.
The “4-in-1” MDAC can additionally perform automated single-DUT calibrations of PE, IEPE, velocity, piezoresistive and VC accelerometers, as well as vibration sensors and transducers, over frequencies from 1 Hz to 10 kHz, utilizing the MB Dynamics CAL50 calibration vibration exciter.
Datasheets for Download
Air Bearing Vibration Calibration Exciters:
CAL25HF High-Frequency Air Bearing Calibration Vibration Exciter (Rev. 01/2019)
CAL25AB Air Bearing Calibration Vibration Exciter (Rev 01/19)
CAL12AB Air Bearing Calibration Vibration Exciter (Rev 01/19)
CAL50, REF & MB500VI Amplifier (Rev 10/18)
Model 405-X Dual-Channel Signal Conditioner (Rev 10/18)
Model & 8706M06- Kistler IEPE REF Accelerometers
Win475 Automated Accelerometer Calibration Systems:
Win475-CAL2-300H, 50 kHz
Win475 HL-BLUE and HL-RED Extreme Range (Rev 01/19)
MB Win475LF Low-Frequency Calibration and Performance Verification System (Rev 5/20)
Win475-TS Transverse Sensitivity (Rev 11/18)
Win475 Drop-Shock (Rev 11/18)
Win475 MULTI-DUT CRASH-CAL Automated Piezoresistive Accelerometer Calibration System (MDCC) (Rev 5/19)
“4-in-1” Multi-DUT Automated Accelerometer Calibration System (MDAC) (Rev 11/19)

